Sourdough Bread Recipe – A Simple, Reliable Loaf for Home Bakers
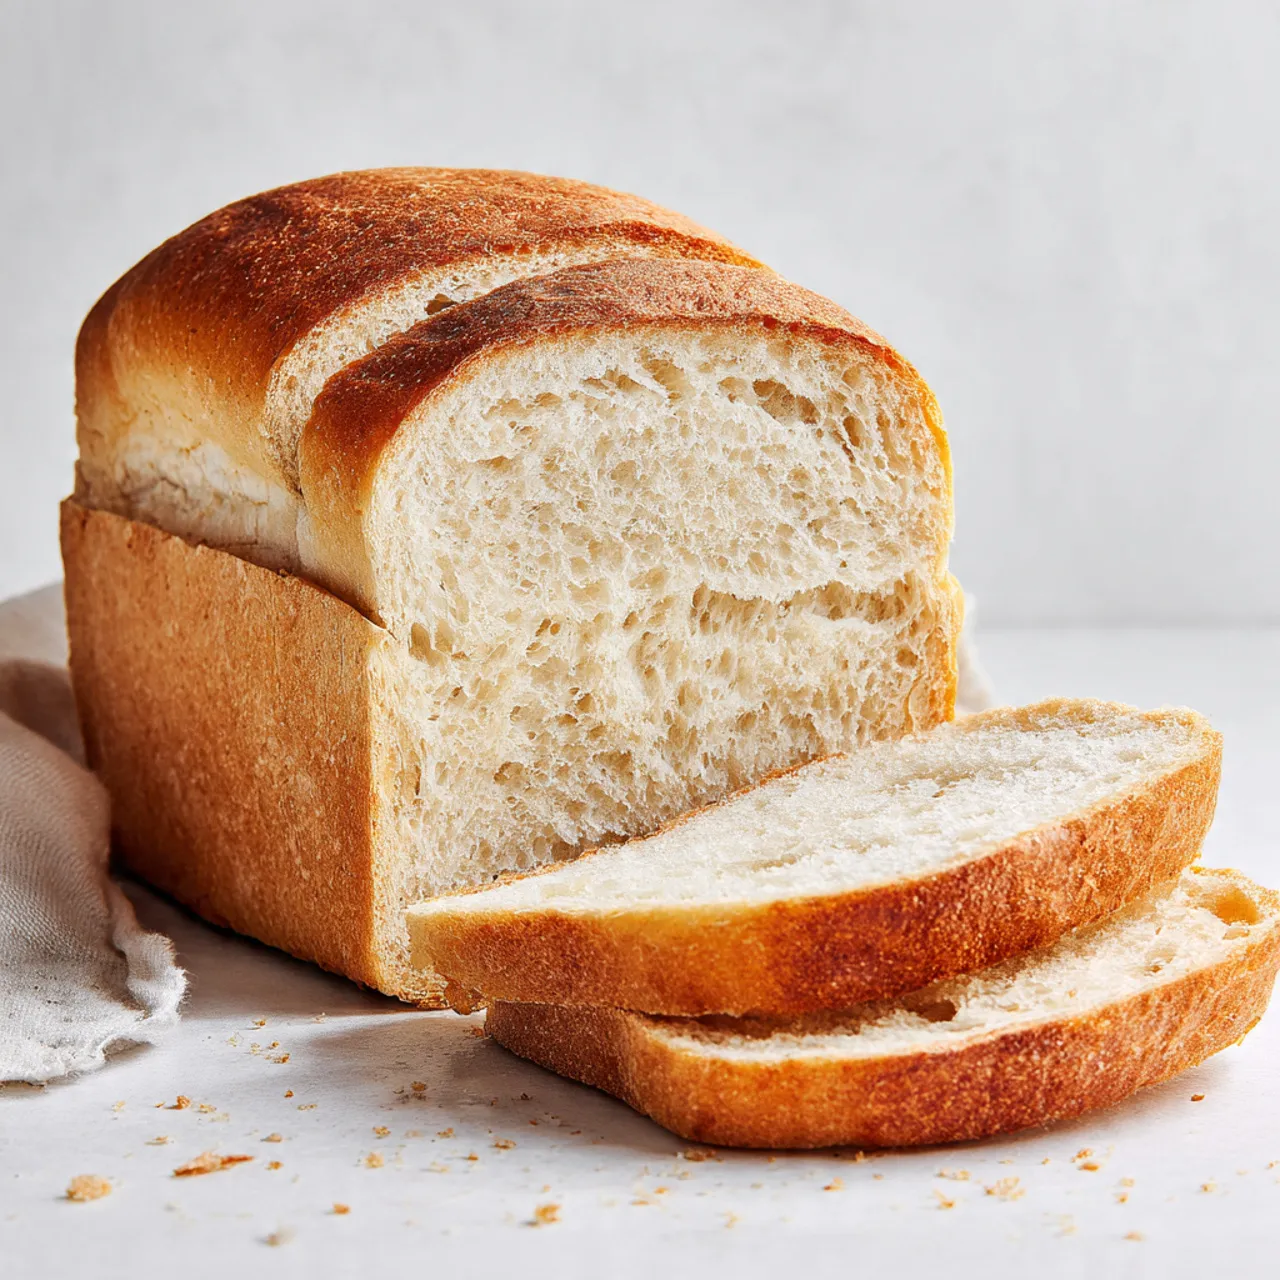
Sourdough has a way of turning flour, water, and salt into something special. It’s chewy, deeply flavorful, and surprisingly satisfying to make at home. If you’ve got a healthy starter and a little patience, you can bake a loaf that’s crusty on the outside and soft inside.
This guide walks you through each step in plain language, with tips that actually help. You’ll get a dependable loaf without fancy tools or confusing jargon.
What Makes This Recipe So Good
This sourdough is beginner-friendly but still delivers great flavor and texture. You’ll use simple techniques: a brief autolyse, a few stretch-and-folds, and an overnight cold proof for better flavor and shape.
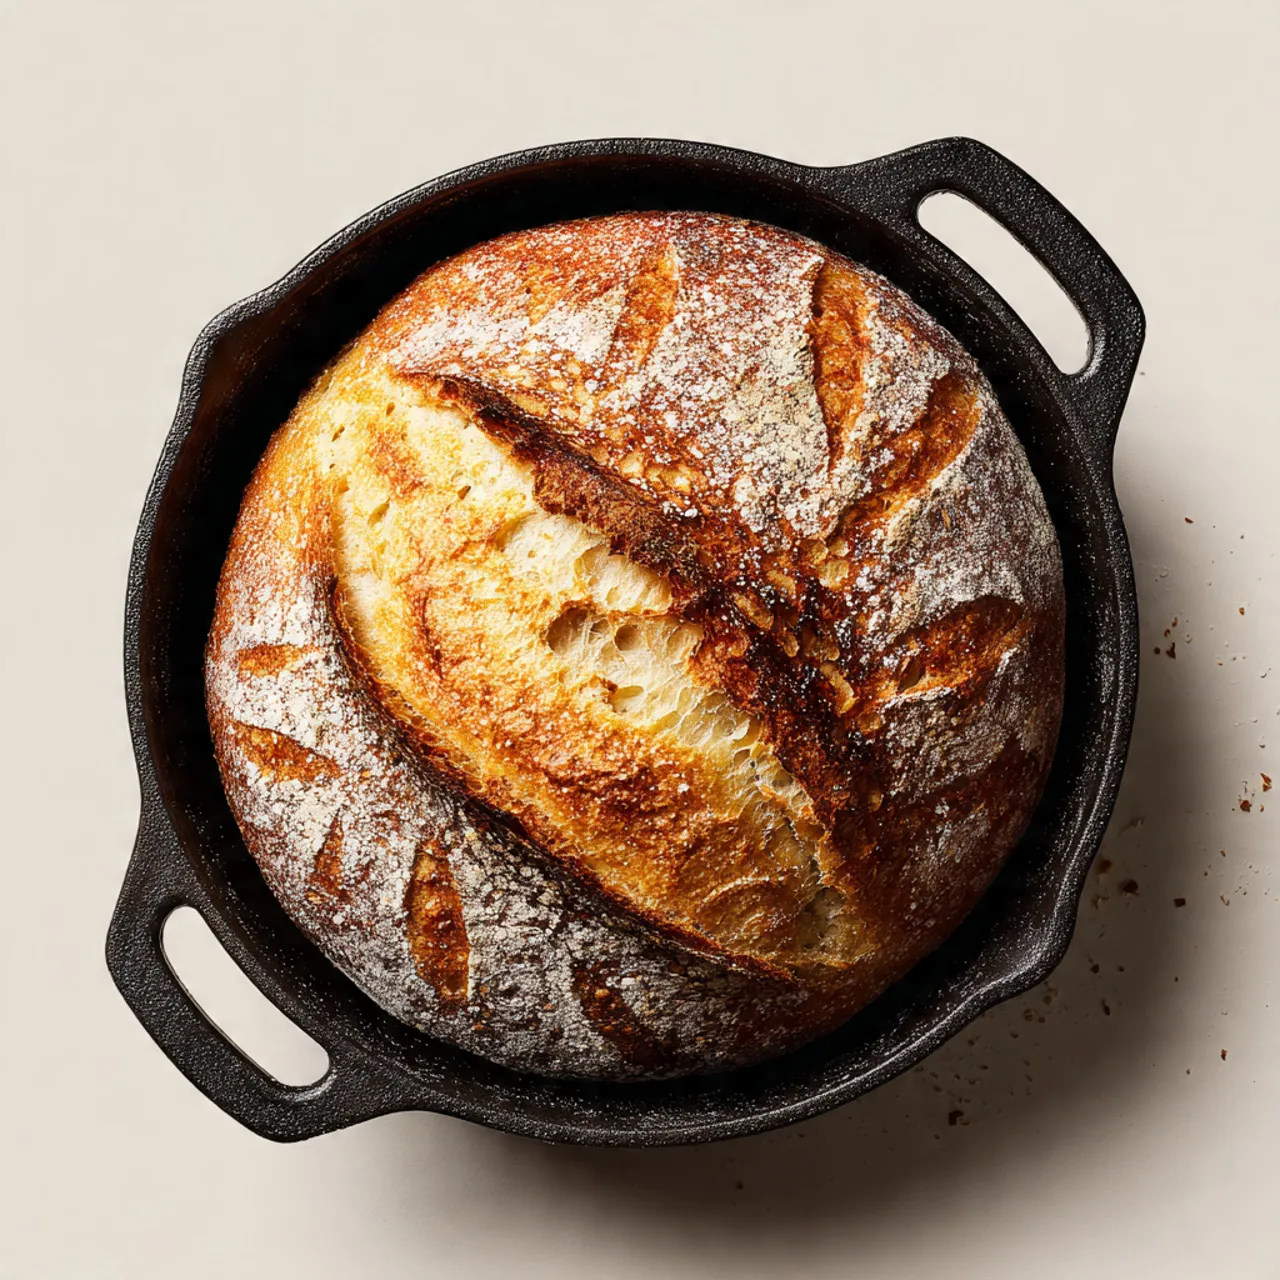
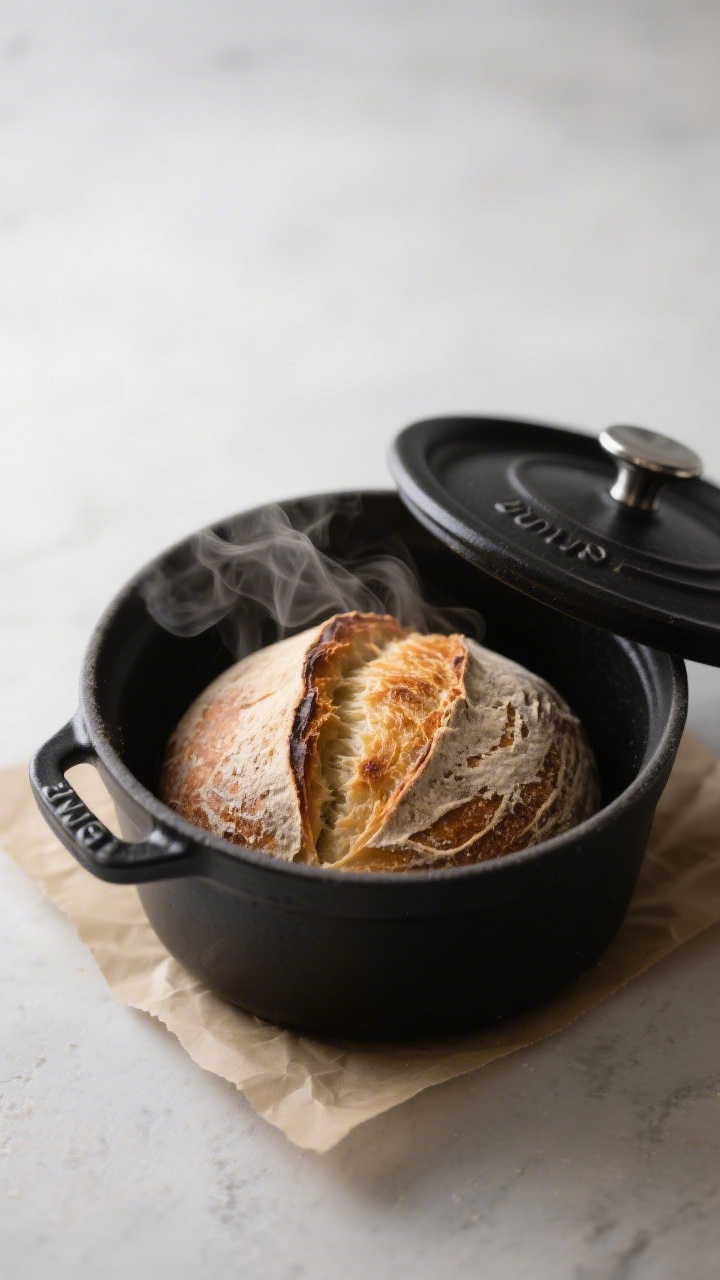
The dough bakes up with a crisp crust, an open but not wild crumb, and a balanced tang. It’s flexible, too—works in a Dutch oven, on a baking stone, or even on a sheet pan with a steam tray.
Most importantly, the steps are clear and repeatable. You’ll learn cues to watch for—like dough feel and rise—so you can adjust to your kitchen’s temperature and humidity.
That means more consistent results and fewer surprises.
Shopping List
- Active sourdough starter (100% hydration; bubbly and doubled within 6–8 hours of feeding)
- Bread flour (high-protein; you can sub up to 20% whole wheat)
- Water (room temperature; filtered if your tap water is heavily chlorinated)
- Kosher or sea salt
- Rice flour (optional; for dusting the proofing basket to prevent sticking)
Basic Formula (Baker’s Percentages): 70% hydration, 20% levain, 2% salt.
- 400 g bread flour
- 80 g whole wheat flour (optional; or replace with more bread flour)
- 340 g water (adjust 10–20 g up or down based on flour and comfort level)
- 120 g active starter
- 10 g salt
How to Make It

- Check your starter. Feed it 6–12 hours before mixing. It should be bubbly, smell pleasantly tangy, and pass the float test in water. If it sinks, give it more time or another feeding.
- Autolyse (30–45 minutes). In a bowl, mix flour and 320 g of the water until no dry bits remain.
The dough will be shaggy and rough. Cover and rest. This boosts gluten development and makes mixing easier.
- Mix in starter and salt. Add 120 g starter and 10 g salt to the dough.
Squeeze and fold until incorporated. If the dough feels stiff, add the remaining 20 g water gradually. Aim for tacky, not soupy.
- Bulk ferment with folds (3–5 hours, 75–78°F ideal). Cover the bowl.
Every 30 minutes for the first 2 hours, perform stretch-and-folds: wet your hand, grab a side, stretch up, fold over; rotate the bowl and repeat 4 times. Stop folding once the dough feels elastic and puffy. Let it rise until increased by roughly 50% with a smoother surface and visible bubbles.
- Bench rest and pre-shape (20–30 minutes). Lightly flour the counter.
Turn out the dough, gently form a loose round using a bench scraper, and let it relax. This helps with final shaping.
- Final shape. For a boule: flip the dough, fold the bottom up, sides to center, then roll up and tighten using surface tension. For a batard: fold and roll into an oval, tightening as you go.
You want a taut skin without tearing.
- Proof. Place seam-side up in a well-dusted banneton (rice flour works best) or a towel-lined bowl. Cover and refrigerate 8–16 hours for a cold proof. This improves flavor and makes scoring easier.
Alternatively, proof at room temp 1–2 hours until slightly puffy.
- Preheat the oven and pot. Place a Dutch oven with lid inside and preheat to 475°F (246°C) for at least 30 minutes. If using a stone or sheet pan, also preheat a steam pan and prepare to add water when loading.
- Score and bake. Turn the dough out onto parchment, seam-side down. Score a 1/2-inch deep slash along the top for controlled expansion.
Load into the hot Dutch oven. Bake covered for 20 minutes, then uncover, reduce to 450°F (232°C), and bake 20–25 minutes more until deep golden-brown with blistered crust.
- Cool completely. Place on a rack and let rest at least 1 hour. Cutting too soon can make the crumb gummy and collapse the structure.
Keeping It Fresh
Let the loaf cool fully before storing.
Slip it into a paper bag or wrap in a clean kitchen towel for the first day to preserve crust crispness. For longer storage, place in a bread box or loosely wrapped in plastic to prevent drying, knowing the crust will soften.
For freezing, slice the loaf, wrap tightly, and freeze for up to 2 months. Toast slices straight from the freezer.
To refresh a whole loaf, bake at 350°F (177°C) for 8–10 minutes to re-crisp the crust.

Why This is Good for You
- Better digestion: Natural fermentation breaks down some gluten and phytic acid, which can make the bread easier on your stomach compared to quick-yeast loaves.
- Steadier energy: The structure and fiber, especially with some whole wheat, can help slow digestion and reduce blood sugar spikes compared to highly refined, fast-rise breads.
- Fewer additives: Just flour, water, and salt—no dough conditioners or preservatives.
- Flavor satisfaction: Rich, tangy notes mean you feel satisfied with smaller portions.
What Not to Do
- Don’t rush the starter. A weak starter makes dense bread. If it’s sluggish, wait or feed again.
- Don’t add too much flour during shaping. Excess flour prevents the seams from sealing and can lead to blowouts.
- Don’t skip the rest periods. Autolyse and bench rests relax the dough so it stretches instead of tears.
- Don’t proof blindly by the clock. Look for signs: puffy dough, slight jiggle, and finger dent that springs back slowly.
- Don’t cut while hot. Steam needs time to set the crumb. Slicing early leads to gummy texture.
Recipe Variations
- Seeded Sourdough: Add 60–80 g mixed seeds (pumpkin, sesame, flax).
Soak flax and chia in water for 20 minutes to avoid stealing hydration.
- Olive and Herb: Fold in 80–100 g chopped, well-drained olives and 1–2 tsp fresh rosemary during the second fold. Reduce added water slightly if olives are very moist.
- Country Loaf: Use 30% whole wheat and increase hydration by 10–20 g to keep the crumb open.
- Whole Rye Accent: Swap 10–15% of the flour with rye for deeper flavor and a slightly tighter crumb.
- No Dutch Oven Method: Bake on a preheated stone or sheet pan. Add a tray of boiling water on the bottom rack for the first 15 minutes to boost steam.
FAQ
How do I know my dough is ready to bake?
During the cold proof, the dough should feel airy and hold its shape when gently pressed.
A light poke should spring back slowly, not immediately. If it feels dense or rebounds fast, it likely needs more time.
My loaf is flat. What went wrong?
Common causes: underdeveloped gluten (not enough folds), underactive starter, or over-proofing.
Next time, ensure your starter is lively, give the dough enough folds until it feels elastic, and use the fridge proof to control timing.
How sour will this taste?
Moderately tangy. For more tang, extend the cold proof up to 18 hours or use a starter that’s fed less frequently. For milder flavor, shorten the cold proof and use a younger starter at peak.
Can I use all-purpose flour?
Yes, but reduce water by 10–20 g at mixing since all-purpose typically absorbs less.
The loaf may be a bit softer and less chewy, but still delicious.
Do I need a banneton?
No. A medium bowl lined with a well-floured kitchen towel works. Dust with a mix of rice and wheat flour for better release.
What if I don’t have a Dutch oven?
Use a preheated baking stone or sheet pan and create steam with a hot water tray.
Bake at the same temperatures, venting steam after 15 minutes to finish crisping the crust.
Can I speed this up?
You can shorten bulk fermentation by warming your dough environment to 78–80°F. However, rushing usually sacrifices flavor and texture. It’s better to plan ahead and proof in the fridge overnight.
In Conclusion
This sourdough bread recipe keeps things simple while giving you the tools to bake a beautiful, flavorful loaf.
Focus on an active starter, gentle folds, and patient proofing, and you’ll get consistent results. Once you’re comfortable, try a variation or two to make it your own. With a little practice, fresh sourdough from your oven will become a regular, no-stress ritual.

Sourdough Bread Recipe - A Simple, Reliable Loaf for Home Bakers
Ingredients
Method
- Check your starter. Feed it 6–12 hours before mixing. It should be bubbly, smell pleasantly tangy, and pass the float test in water. If it sinks, give it more time or another feeding.
- Autolyse (30–45 minutes). In a bowl, mix flour and 320 g of the water until no dry bits remain.The dough will be shaggy and rough. Cover and rest. This boosts gluten development and makes mixing easier.
- Mix in starter and salt. Add 120 g starter and 10 g salt to the dough.Squeeze and fold until incorporated. If the dough feels stiff, add the remaining 20 g water gradually. Aim for tacky, not soupy.
- Bulk ferment with folds (3–5 hours, 75–78°F ideal). Cover the bowl.Every 30 minutes for the first 2 hours, perform stretch-and-folds: wet your hand, grab a side, stretch up, fold over; rotate the bowl and repeat 4 times. Stop folding once the dough feels elastic and puffy. Let it rise until increased by roughly 50% with a smoother surface and visible bubbles.
- Bench rest and pre-shape (20–30 minutes). Lightly flour the counter.Turn out the dough, gently form a loose round using a bench scraper, and let it relax. This helps with final shaping.
- Final shape. For a boule: flip the dough, fold the bottom up, sides to center, then roll up and tighten using surface tension. For a batard: fold and roll into an oval, tightening as you go.You want a taut skin without tearing.
- Proof. Place seam-side up in a well-dusted banneton (rice flour works best) or a towel-lined bowl. Cover and refrigerate 8–16 hours for a cold proof. This improves flavor and makes scoring easier.Alternatively, proof at room temp 1–2 hours until slightly puffy.
- Preheat the oven and pot. Place a Dutch oven with lid inside and preheat to 475°F (246°C) for at least 30 minutes. If using a stone or sheet pan, also preheat a steam pan and prepare to add water when loading.
- Score and bake. Turn the dough out onto parchment, seam-side down. Score a 1/2-inch deep slash along the top for controlled expansion.Load into the hot Dutch oven. Bake covered for 20 minutes, then uncover, reduce to 450°F (232°C), and bake 20–25 minutes more until deep golden-brown with blistered crust.
- Cool completely. Place on a rack and let rest at least 1 hour. Cutting too soon can make the crumb gummy and collapse the structure.
Printable Recipe Card
Want just the essential recipe details without scrolling through the article? Get our printable recipe card with just the ingredients and instructions.