Homemade Pita Bread Recipe – Soft, Puffy, and Perfect for Stuffing
Warm, fresh pita bread is one of those simple pleasures that never gets old. It’s soft, slightly chewy, and puffs up into a perfect pocket when baked just right. If you’ve only had store-bought pita, you’re in for a treat—homemade tastes brighter, fresher, and more satisfying.
You don’t need special equipment, and the dough is very forgiving. With a few tips and a hot oven, you’ll get reliable puff and a stack of warm pitas you’ll want to eat right away.
What Makes This Special
This recipe balances tenderness and chew with a mix of all-purpose flour and a touch of whole wheat. It’s designed to work in a standard home oven or on a hot skillet, so no bakery setup required.
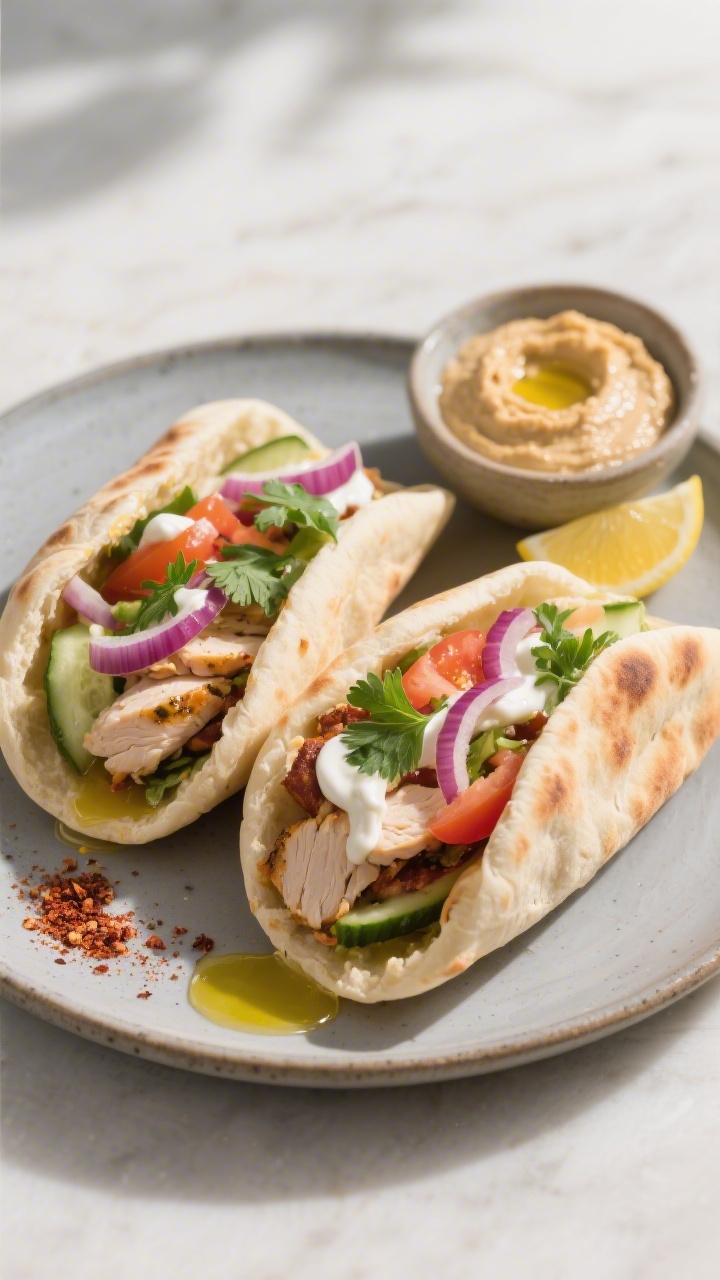
The dough is easy to handle, and the rest times are short enough for a weeknight project. Best of all, the pitas puff beautifully, giving you that classic pocket for falafel, chicken shawarma, or simple hummus and veggies. You’ll also get great flavor from a slow, brief rise that brings out a gentle sweetness.
Ingredients
- 2 cups (260 g) all-purpose flour
- 1 cup (120 g) whole wheat flour (or use all all-purpose for a softer pita)
- 2 teaspoons instant yeast (or active dry yeast, see FAQ)
- 1 teaspoon fine sea salt
- 1 tablespoon sugar or honey
- 1 tablespoon olive oil (plus a little for the bowl)
- 1 to 1¼ cups (240–300 ml) warm water (about 105–115°F/40–46°C)
- Optional: 1–2 tablespoons plain yogurt for extra tenderness
Instructions
- Mix the dry ingredients. In a large bowl, whisk together the all-purpose flour, whole wheat flour, yeast, salt, and sugar.
Keep the salt and yeast from direct contact until mixed to avoid dulling the yeast.
- Add liquids and bring it together. Stir in the olive oil and 1 cup warm water (plus yogurt if using). Mix with a spoon until a shaggy dough forms. Add more water, a tablespoon at a time, until the dough holds together and is slightly tacky but not sticky.
- Knead until smooth. Turn the dough onto a lightly floured surface and knead for 6–8 minutes, or use a stand mixer with the dough hook for 5–6 minutes.
You want a smooth, elastic dough that springs back when poked.
- First rise. Lightly oil a bowl, place the dough inside, and cover with a damp towel or plastic wrap. Let it rise in a warm spot until puffy and nearly doubled, about 60–75 minutes. If your kitchen is cool, give it more time.
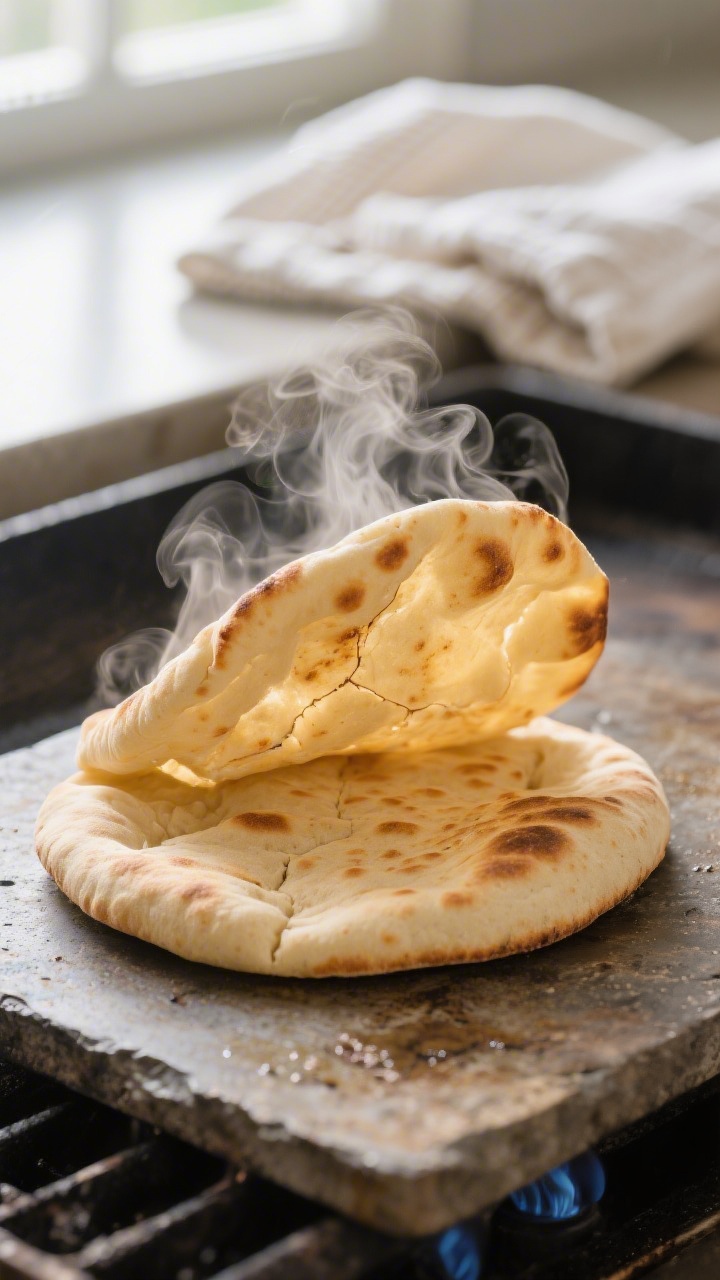
- Preheat for the puff. Place a baking stone, cast-iron griddle, or an inverted baking sheet in the oven and preheat to 475°F (245°C) for at least 20 minutes.
A very hot surface is key to forming the pocket.
- Divide and rest. Turn the dough out onto a lightly floured counter. Gently deflate and divide into 8 pieces for standard pitas, or 10 for smaller ones. Shape each into a tight ball.
Cover and rest for 15 minutes to relax the gluten.
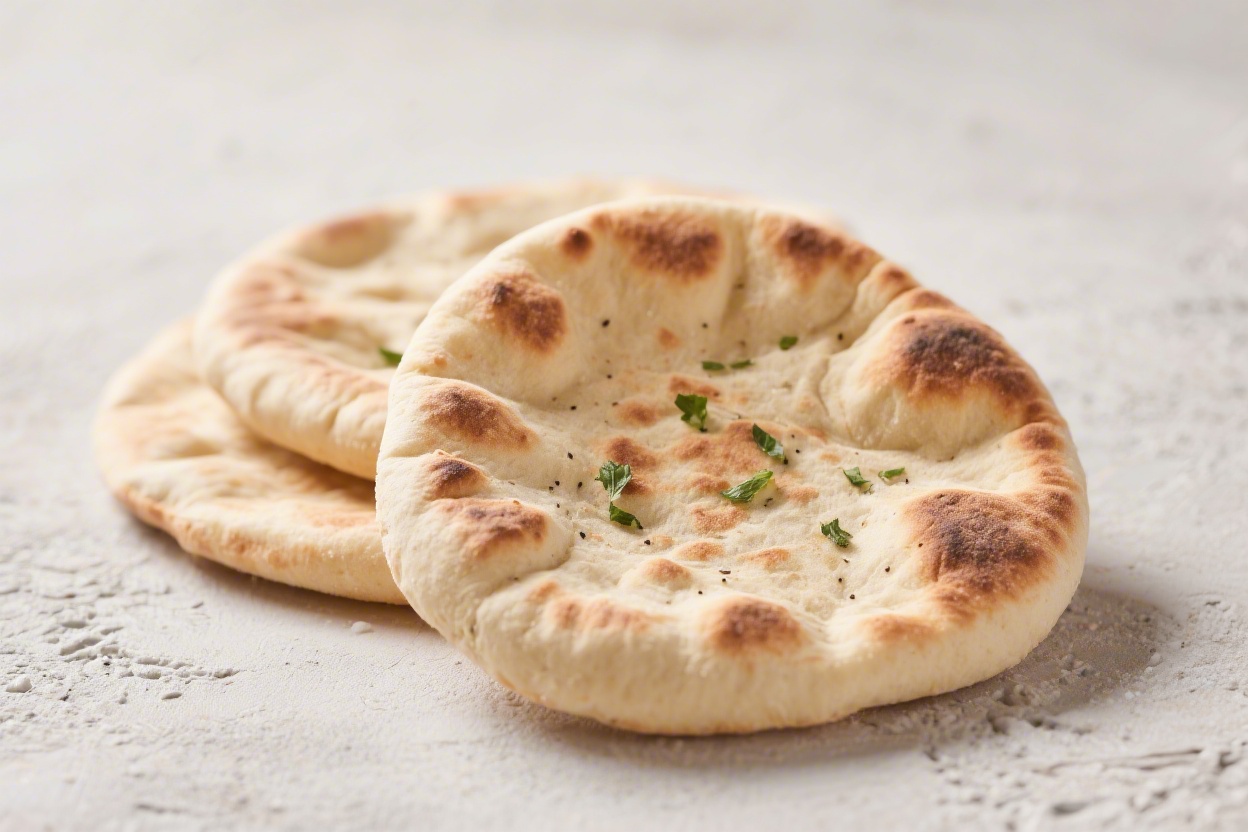
- Roll evenly. Working with one piece at a time, roll into a circle about 6–7 inches wide and roughly 1/8 inch (3 mm) thick. Keep the thickness even—this is what helps create the pocket. Dust off excess flour.
- Bake quickly. Carefully place 2–3 pitas at a time onto the hot stone or sheet.
Bake for 2–3 minutes until they puff dramatically. Flip and bake for another 1 minute to lightly brown the other side without drying them out.
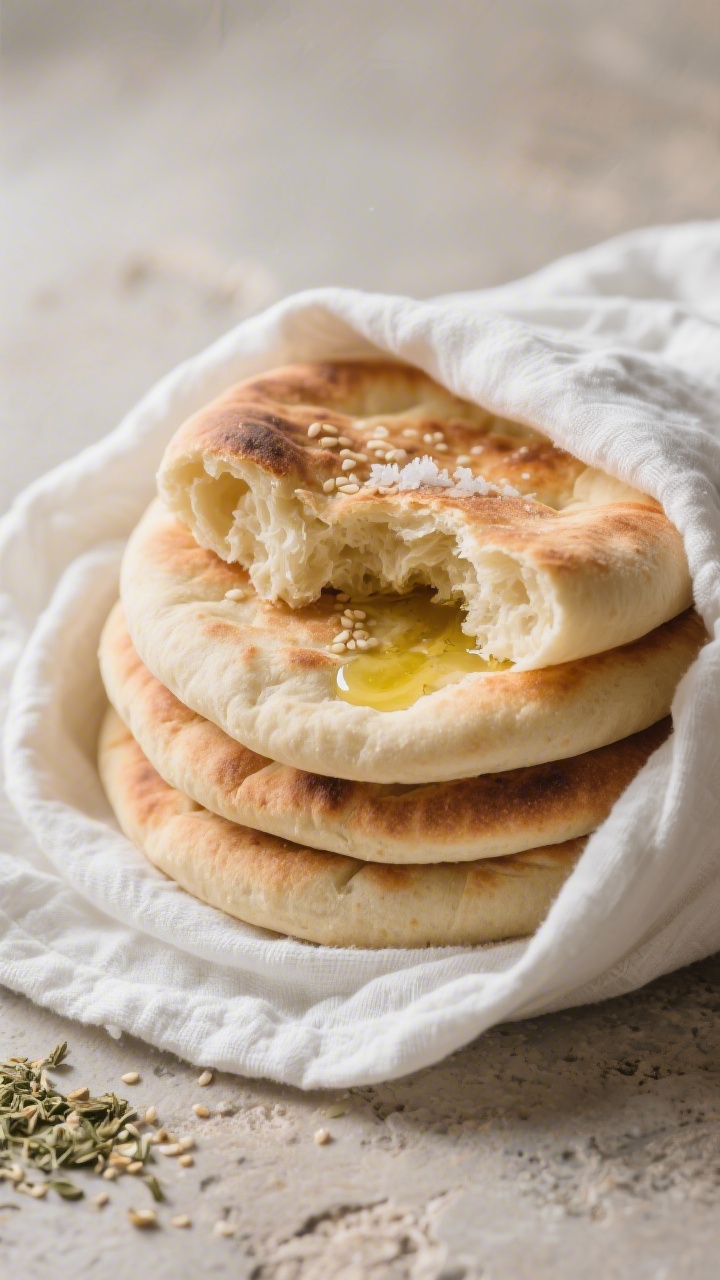
- Cover to keep soft. Transfer hot pitas to a clean kitchen towel and cover. The steam softens them and keeps the texture tender.
Repeat with the remaining dough.
- Skillet option. Heat a cast-iron skillet over medium-high until very hot. Cook each pita for 1–2 minutes per side, flipping once the surface bubbles and light spots appear. Press gently with a spatula to encourage puff.
Keeping It Fresh
Fresh pita is best the day it’s made, but it holds up well if stored right.
Let the bread cool, then keep it in a resealable bag at room temperature for up to 2 days. For longer storage, freeze in a freezer bag with the air pressed out for up to 2 months. Reheat frozen pita in a 300°F (150°C) oven wrapped in foil for 8–10 minutes, or toss it directly onto a hot skillet for a minute per side.
To revive day-old pita, sprinkle lightly with water, wrap in foil, and warm until soft.
Why This is Good for You
Pita is simple, wholesome, and versatile. Whole wheat adds fiber and micronutrients, which help with fullness and steady energy. Homemade versions typically use less sodium and no added preservatives compared to packaged bread.
Because pitas are portioned, they make it easier to build balanced meals—fill with lean proteins, veggies, and creamy spreads like hummus or yogurt sauce. You’ll also skip the hidden oils and sweeteners often found in store-bought options.
What Not to Do
- Don’t rush the preheat. A lukewarm oven won’t puff the pitas. Heat the baking surface thoroughly.
- Don’t roll unevenly. Thick edges and thin centers prevent proper pocket formation.
Keep the thickness uniform.
- Don’t overload with flour. Too much bench flour dries the dough and can toughen the crust.
- Don’t overbake. Extra time turns soft pitas into brittle discs. Pull them once puffed and lightly colored.
- Don’t skip the covered rest after baking. Trapping steam keeps them supple and flexible.
Alternatives
- Flour swaps: Use all all-purpose for softer pitas or go up to 50% whole wheat for a heartier chew. If using bread flour, the dough may need a touch more water.
- No yeast today? Try a quick version using 2 teaspoons baking powder and 1/2 teaspoon baking soda with 3/4 cup yogurt; it won’t create a full pocket but makes soft, fluffy flatbreads.
- Gluten-free: Use a 1:1 gluten-free flour blend designed for yeast baking and add 1 teaspoon psyllium husk.
Expect less dramatic puff, but you’ll still get tasty flatbreads.
- Flavor boosts: Mix in 1–2 teaspoons of za’atar, sesame seeds, or garlic powder. A tablespoon of olive oil brushed on warm pitas adds richness.
- Cooking methods: Grill over medium-high heat for a smoky flavor. Close the lid to trap heat and encourage puff.
FAQ
Can I use active dry yeast instead of instant yeast?
Yes.
Use the same amount. Stir the yeast and sugar into the warm water and let it sit for 5–10 minutes until foamy, then add to the flour and salt. If it doesn’t foam, your yeast may be inactive.
Why didn’t my pitas puff?
Usually the oven or pan wasn’t hot enough, or the dough was rolled unevenly.
Also check that your dough wasn’t too dry—slightly tacky dough traps steam better. Finally, avoid pressing too hard with the rolling pin, which can seal the layers together.
How thick should I roll the dough?
Aim for about 1/8 inch (3 mm). Thicker dough won’t heat through fast enough to create steam, while paper-thin rounds can dry out and crack.
Can I make the dough ahead?
Absolutely.
After kneading, cover and refrigerate for up to 24 hours. Let it come to room temperature for 45–60 minutes before dividing, resting, and rolling. Cold fermentation adds flavor and improves texture.
What’s the best way to reheat pita without drying it out?
Wrap in a damp paper towel and microwave in 10–15 second bursts, or warm in a 300°F (150°C) oven wrapped in foil.
A quick toast in a hot skillet works too—just don’t overdo it.
Do I need a baking stone?
No. An inverted, preheated baking sheet or a heavy cast-iron pan works well. The key is a thoroughly heated surface so the dough puffs fast.
Can I make mini pitas for appetizers?
Yes.
Divide the dough into 12–14 pieces and roll to 4–5 inches. Bake the same way; they’ll puff and cook slightly faster.
Why do some pitas get pockets and others don’t in the same batch?
Minor differences in thickness, moisture, or oven hot spots can affect puff. Keep rolling consistent, rotate the baking sheet if needed, and ensure each round goes onto a very hot surface.
In Conclusion
Homemade pita bread is simple, fast, and deeply rewarding.
With a hot oven, evenly rolled dough, and a brief covered rest after baking, you’ll get soft, puffy pitas every time. Keep a batch on hand for quick lunches, weeknight wraps, or last-minute dips. Once you taste them warm, you’ll see why they’re worth the small effort.
Homemade Pita Bread Recipe - Soft, Puffy, and Perfect for Stuffing
Ingredients
Method
- Mix the dry ingredients. In a large bowl, whisk together the all-purpose flour, whole wheat flour, yeast, salt, and sugar.Keep the salt and yeast from direct contact until mixed to avoid dulling the yeast.
- Add liquids and bring it together. Stir in the olive oil and 1 cup warm water (plus yogurt if using). Mix with a spoon until a shaggy dough forms. Add more water, a tablespoon at a time, until the dough holds together and is slightly tacky but not sticky.
- Knead until smooth. Turn the dough onto a lightly floured surface and knead for 6–8 minutes, or use a stand mixer with the dough hook for 5–6 minutes.You want a smooth, elastic dough that springs back when poked.
- First rise. Lightly oil a bowl, place the dough inside, and cover with a damp towel or plastic wrap. Let it rise in a warm spot until puffy and nearly doubled, about 60–75 minutes. If your kitchen is cool, give it more time.
- Preheat for the puff. Place a baking stone, cast-iron griddle, or an inverted baking sheet in the oven and preheat to 475°F (245°C) for at least 20 minutes.A very hot surface is key to forming the pocket.
- Divide and rest. Turn the dough out onto a lightly floured counter. Gently deflate and divide into 8 pieces for standard pitas, or 10 for smaller ones. Shape each into a tight ball.Cover and rest for 15 minutes to relax the gluten.
- Roll evenly. Working with one piece at a time, roll into a circle about 6–7 inches wide and roughly 1/8 inch (3 mm) thick. Keep the thickness even—this is what helps create the pocket. Dust off excess flour.
- Bake quickly. Carefully place 2–3 pitas at a time onto the hot stone or sheet.Bake for 2–3 minutes until they puff dramatically. Flip and bake for another 1 minute to lightly brown the other side without drying them out.
- Cover to keep soft. Transfer hot pitas to a clean kitchen towel and cover. The steam softens them and keeps the texture tender.Repeat with the remaining dough.
- Skillet option. Heat a cast-iron skillet over medium-high until very hot. Cook each pita for 1–2 minutes per side, flipping once the surface bubbles and light spots appear. Press gently with a spatula to encourage puff.
Printable Recipe Card
Want just the essential recipe details without scrolling through the article? Get our printable recipe card with just the ingredients and instructions.