French Bread Recipe – A Simple, Crusty Loaf for Everyday Meals
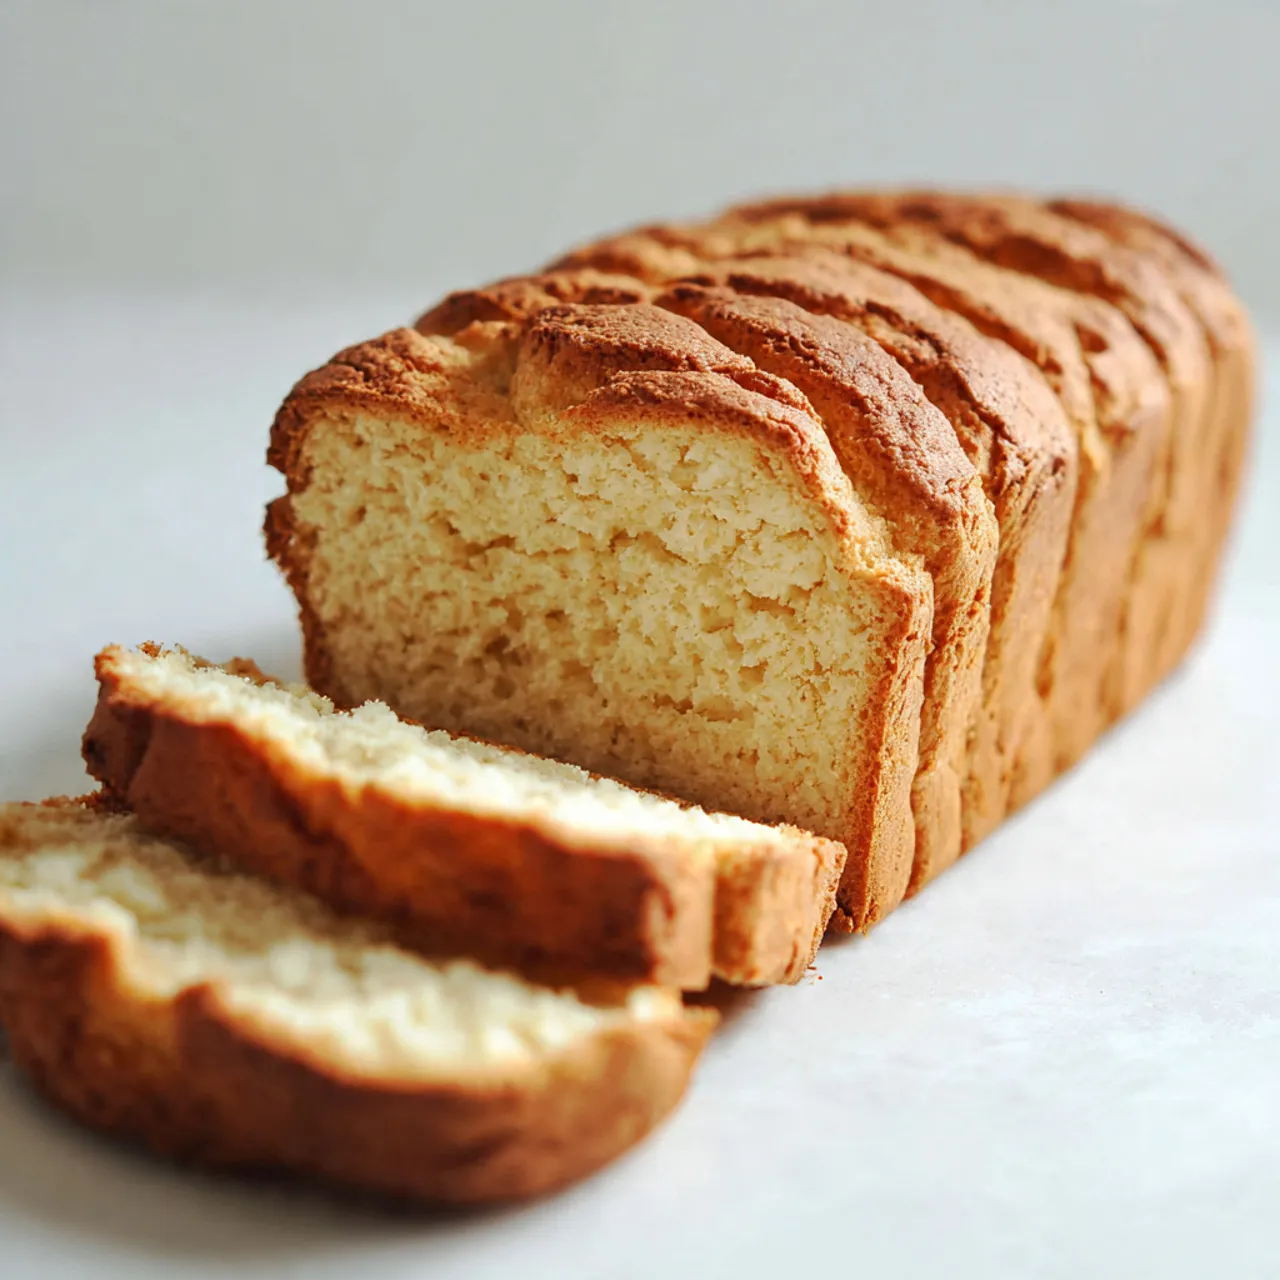
Warm, fresh bread on the table makes even an ordinary meal feel like something special. This French bread recipe gives you that classic crackly crust with a light, tender interior—no fancy equipment required. If you’ve been nervous about baking with yeast, this is a friendly place to start.
The steps are simple, the ingredients are basic, and the payoff is huge. Give yourself a little time, and you’ll have a bakery-style loaf you’ll want to make again and again.
What Makes This Special

This recipe is built for home kitchens. You don’t need a stone oven, steam injectors, or years of practice.
A hot oven, a little water for steam, and good timing are enough to get that signature crust.
The dough is lean—just flour, water, yeast, and salt—so the flavor depends on technique. A brief autolyse (resting the flour and water) and a slow rise help build structure and taste. You can make one large loaf or two smaller batards, and both bake beautifully on a standard sheet pan.
Best of all, it’s flexible.
Use bread flour for extra chew or all-purpose flour for a softer crumb. The process works with both active dry and instant yeast, and you can chill the dough if your schedule gets busy.
Ingredients
- 3 1/2 cups (440 g) bread flour (or all-purpose flour for a softer texture)
- 1 1/4 cups (300 ml) warm water (about 105–110°F / 40–43°C)
- 2 1/4 tsp (7 g) instant yeast (or active dry yeast)
- 2 tsp (10 g) fine sea salt
- 1 tsp sugar or honey (optional, helps jump-start yeast)
- 1 tbsp olive oil (optional, for a slightly softer crust)
- Extra flour for dusting
Instructions
- Bloom the yeast (if using active dry): In a small bowl, mix warm water with sugar or honey. Sprinkle active dry yeast on top and let stand 5–10 minutes until foamy.
If using instant yeast, skip this and add it directly to the flour.
- Mix the dough: In a large bowl, combine flour and salt. Add the yeast mixture (or water if using instant yeast) and olive oil if using. Stir with a wooden spoon until a shaggy dough forms and no dry flour remains.
- Autolyse (optional but helpful): Let the dough rest, covered, for 15–20 minutes.
This improves gluten development and makes kneading easier.
- Knead: Turn the dough onto a lightly floured surface. Knead for 8–10 minutes until smooth, elastic, and slightly tacky. If it’s very sticky, dust sparingly with flour; avoid adding too much.
- First rise: Place the dough in a lightly oiled bowl, turning to coat.
Cover and let rise in a warm spot until doubled, about 60–90 minutes. A slow rise builds flavor, so don’t rush it.
- Shape: Gently deflate the dough. For one large loaf, form a rectangle, then roll it up tightly from the long side, pinching the seam.
For two smaller loaves, divide the dough and shape each the same way. Tuck the ends under for a neat look.
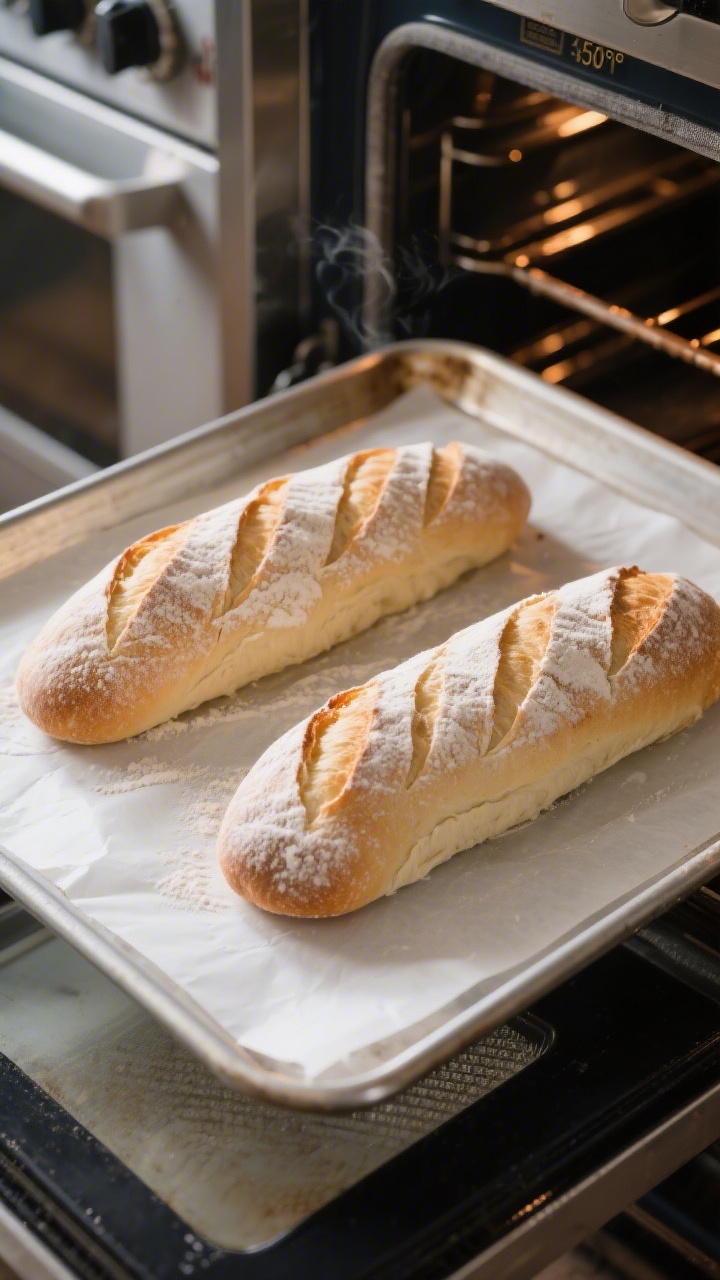
- Second rise: Place the shaped loaf or loaves seam-side down on a parchment-lined baking sheet. Cover loosely and let rise until puffy, about 30–45 minutes.
The dough should spring back slowly when poked.
- Preheat and steam setup: Heat the oven to 450°F (232°C). Place an empty metal pan on a lower rack to heat up. This will help create steam for a crisp crust.
- Score: Using a sharp knife or lame, make 3–4 diagonal slashes about 1/4 inch deep along the top.
This guides the expansion in the oven.
- Steam and bake: Place the bread in the oven. Carefully pour 1 cup of hot water into the preheated pan and close the oven door immediately to trap steam. Bake for 22–28 minutes for two loaves or 28–32 minutes for one large loaf, until deep golden brown.
- Check for doneness: The loaf should sound hollow when tapped on the bottom and register around 205–210°F (96–99°C) internally.
- Cool: Transfer to a wire rack and let cool at least 30 minutes before slicing.
This finishes the crumb and keeps it from gummy texture.
How to Store
- Room temperature: Keep the loaf in a paper bag or wrapped in a clean kitchen towel for up to 2 days. This preserves the crust better than plastic.
- Freezing: Slice the bread, wrap tightly in foil or plastic, then place in a freezer bag. Freeze for up to 2 months.
Reheat slices in a toaster or the whole loaf in a 350°F (175°C) oven for 10–12 minutes.
- Avoid the fridge: Refrigeration dries bread out quickly and dulls the flavor.
Benefits of This Recipe
- Beginner-friendly: Straightforward steps and common ingredients make this a great first yeast bread.
- Bakery-style crust: Steam and high heat deliver that classic shatter when you slice.
- Flexible timing: You can slow the first rise in the fridge if needed, up to 12 hours.
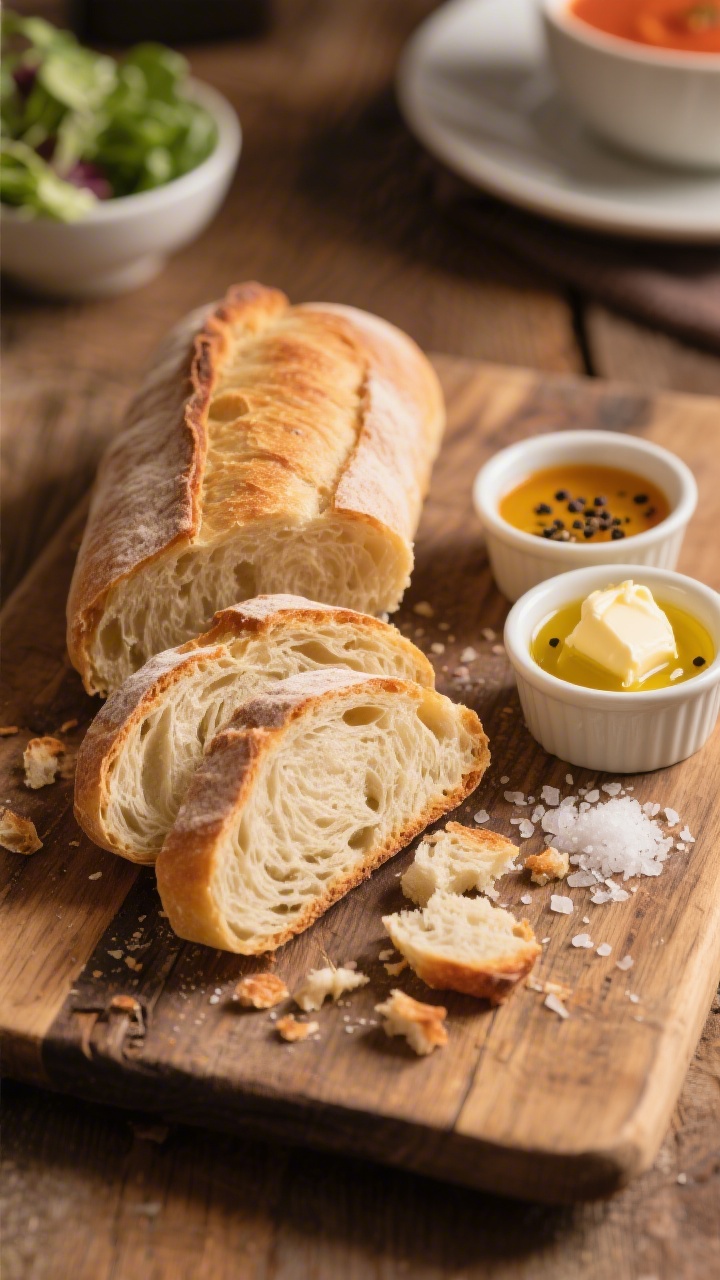
- Versatile serving: Pairs with soups, salads, cheese boards, or simple butter and jam.
- Cost-effective: A few pantry staples turn into an impressive loaf that feeds a crowd.
What Not to Do
- Don’t rush the rise: Underproofed dough won’t expand well and can split oddly in the oven.
- Don’t drown the dough in flour: Too much flour during kneading leads to a dense, dry crumb.
- Don’t skip scoring: Without slashes, steam inside the loaf may cause uncontrolled cracks.
- Don’t slice too soon: Cutting while hot compresses the crumb and makes it gummy.
- Don’t use cold water: Yeast needs warmth to activate; lukewarm is best.
Alternatives
- Overnight rise: After the first knead, cover and refrigerate the dough overnight. Bring to room temperature, shape, proof, and bake as usual. This deepens flavor.
- Whole wheat twist: Swap up to 30% of the flour for whole wheat.
Add 1–2 extra tablespoons of water as whole wheat absorbs more moisture.
- Garlic and herb: Mix 1–2 teaspoons dried herbs and 2–3 minced garlic cloves into the dough during mixing for an aromatic loaf.
- Semolina crunch: Dust the baking sheet with semolina or cornmeal for a rustic bottom crust.
- Dutch oven option: Shape into a round and bake covered at 450°F (232°C) for 20 minutes, then uncovered 10–15 minutes. The lid traps steam naturally.
FAQ
Can I use all-purpose flour instead of bread flour?
Yes. All-purpose flour works fine and produces a slightly softer, more tender crumb.
Bread flour adds a bit more chew and structure. Both yield a great loaf.
What if I only have active dry yeast?
Use the same amount. Bloom it in warm water with a pinch of sugar until foamy, then mix into the flour.
If it doesn’t foam after 10 minutes, the yeast may be expired.
How do I get a really crisp crust?
Use high heat, proper steam in the first 10 minutes, and avoid storing in plastic. Re-crisp day-old bread in a 375°F (190°C) oven for 6–8 minutes.
My dough is sticky—should I add more flour?
Only a little if it’s truly unworkable. Slight stickiness is normal and helps with oven spring.
Try lightly oiling your hands and work surface before adding more flour.
Can I make baguettes with this dough?
Yes. Divide into two or three pieces, shape into longer, thinner loaves, proof on a floured towel (couche) to hold their shape, score, and bake 18–22 minutes.
How do I know when the dough is proofed?
Poke it gently. If the indentation springs back slowly and not fully, it’s ready.
If it bounces back instantly, it needs more time. If it collapses, it’s overproofed—reshape gently and proof again briefly.
Can I add butter or milk?
You can, but it turns this into more of a soft sandwich bread. For classic French bread, stick to water and a lean dough.
A tablespoon of olive oil is a mild compromise.
Why did my loaf split on the side?
Usually it’s from underproofing or shallow scoring. Let the second rise go a bit longer next time and make sure your slashes are deep enough to guide expansion.
What’s the best way to slice it?
Use a sharp serrated knife and a gentle sawing motion once the bread is fully cooled. For sandwiches, cut slightly on the bias for longer slices.
How can I add more flavor?
Extend fermentation with a cold overnight rise, or add a pre-ferment like a poolish (equal parts flour and water with a pinch of yeast, rested 8–12 hours).
Either option boosts complexity.
Final Thoughts
This French bread recipe rewards patience more than skill. With a warm rise, a sharp blade for scoring, and a burst of steam, you’ll get that golden, crackly crust and a light, airy crumb. Keep it simple, trust the process, and enjoy the aroma that fills your kitchen.
Once you make your first loaf, you’ll have a new go-to for weeknights, gatherings, and everything in between.
French Bread Recipe - A Simple, Crusty Loaf for Everyday Meals
Ingredients
Method
- Bloom the yeast (if using active dry): In a small bowl, mix warm water with sugar or honey. Sprinkle active dry yeast on top and let stand 5–10 minutes until foamy.If using instant yeast, skip this and add it directly to the flour.
- Mix the dough: In a large bowl, combine flour and salt. Add the yeast mixture (or water if using instant yeast) and olive oil if using. Stir with a wooden spoon until a shaggy dough forms and no dry flour remains.
- Autolyse (optional but helpful): Let the dough rest, covered, for 15–20 minutes.This improves gluten development and makes kneading easier.
- Knead: Turn the dough onto a lightly floured surface. Knead for 8–10 minutes until smooth, elastic, and slightly tacky. If it’s very sticky, dust sparingly with flour; avoid adding too much.
- First rise: Place the dough in a lightly oiled bowl, turning to coat.Cover and let rise in a warm spot until doubled, about 60–90 minutes. A slow rise builds flavor, so don’t rush it.
- Shape: Gently deflate the dough. For one large loaf, form a rectangle, then roll it up tightly from the long side, pinching the seam.For two smaller loaves, divide the dough and shape each the same way. Tuck the ends under for a neat look.
- Second rise: Place the shaped loaf or loaves seam-side down on a parchment-lined baking sheet. Cover loosely and let rise until puffy, about 30–45 minutes.The dough should spring back slowly when poked.
- Preheat and steam setup: Heat the oven to 450°F (232°C). Place an empty metal pan on a lower rack to heat up. This will help create steam for a crisp crust.
- Score: Using a sharp knife or lame, make 3–4 diagonal slashes about 1/4 inch deep along the top.This guides the expansion in the oven.
- Steam and bake: Place the bread in the oven. Carefully pour 1 cup of hot water into the preheated pan and close the oven door immediately to trap steam. Bake for 22–28 minutes for two loaves or 28–32 minutes for one large loaf, until deep golden brown.
- Check for doneness: The loaf should sound hollow when tapped on the bottom and register around 205–210°F (96–99°C) internally.
- Cool: Transfer to a wire rack and let cool at least 30 minutes before slicing.This finishes the crumb and keeps it from gummy texture.
Printable Recipe Card
Want just the essential recipe details without scrolling through the article? Get our printable recipe card with just the ingredients and instructions.