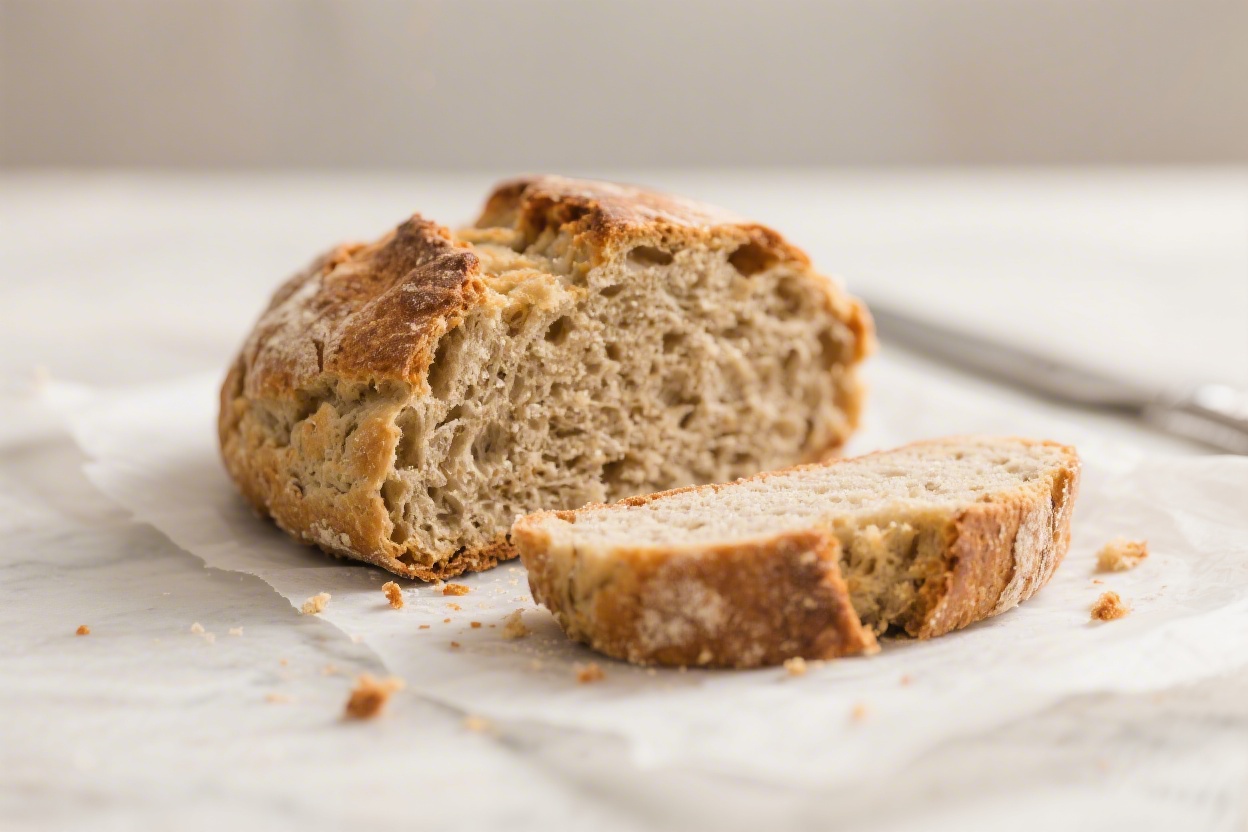
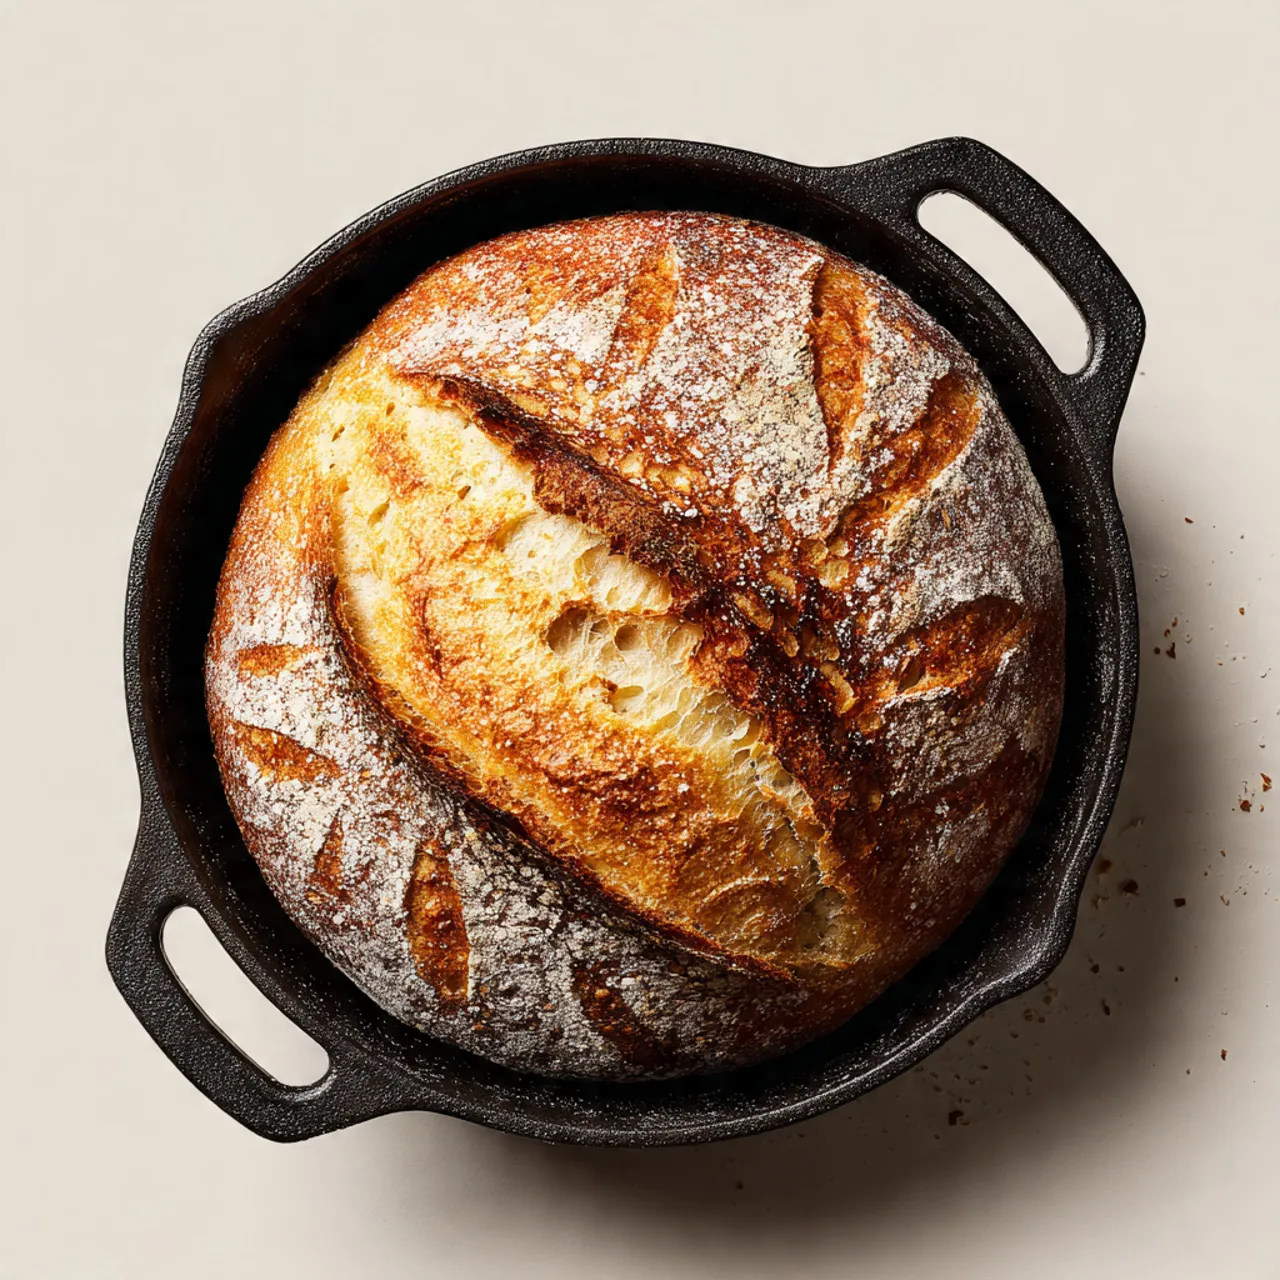
Dutch Oven Bread
Dutch Oven Bread
There’s something deeply comforting about pulling a warm loaf of bread from the oven, especially when it didn’t require fancy tools or hours of effort. Dutch oven bread is loved because it feels old-fashioned and practical at the same time. The crust turns golden and crackly, the inside stays soft and chewy, and the whole kitchen smells like home. This recipe fits real life: quiet mornings, busy evenings, or cold nights when you just want something simple and filling on the table. I usually mix the dough while the house is settling down, knowing the oven will do most of the work later. It’s low effort, high comfort, and incredibly rewarding.

Why You Will Love This Recipe
This recipe is cozy in the most practical way. It doesn’t ask for special skills, expensive ingredients, or constant attention. The flavor develops slowly, giving you that deep, bakery-style taste without stepping outside your kitchen. It’s flexible enough to fit into your schedule, whether you bake it the same day or let the dough rest overnight. Leftovers hold up beautifully for toast, sandwiches, or dipping into soups, making it budget-friendly and low waste. It’s also crowd-pleasing, the kind of bread that feels special on the table but still familiar. If you like recipes you can save and come back to again and again, this dutch oven bread quietly earns its place in your regular rotation.

Ingredients
Tip: Use all-purpose flour for a reliable rise and soft interior without extra fuss.
Instructions
Step 1: Preparation
In a large bowl, stir together flour, salt, and yeast. Pour in warm water and mix until a shaggy, sticky dough forms. It won’t look smooth yet, and that’s exactly what you want.
Step 2: Main Cooking Process
Cover the bowl loosely and let the dough rest at room temperature. Over time, it will puff slightly and smell gently yeasty. The surface should look bubbly and relaxed, not tight or dry.
Step 3: Combining Ingredients
Turn the dough onto a floured surface and fold it over itself a few times. It should feel soft and stretchy. Shape it into a rough round, handling it gently to keep air inside.
Step 4: Finishing & Final Simmer
Place the dough into a hot, covered Dutch oven and bake until the crust turns deep golden. Remove the lid near the end to deepen color. Cool slightly before slicing for best texture.
Why This Recipe Works for Busy Days
This recipe is forgiving and mostly hands-off, which makes it ideal for days when cooking feels like a chore. You can mix the dough ahead, bake when convenient, and rely on leftovers later. It’s the kind of recipe Pinterest users save knowing future them will be grateful for something easy, filling, and homemade without stress.
Tips & Tricks
Variations
Serving Suggestions
Storage Instructions
Recipe Timing
Nutrition Information (Approximate)
Calories: 140–180 per slice
Protein: 4–6 grams per slice
This bread also provides carbohydrates for energy and small amounts of iron from the flour. Values are approximate and can vary depending on portion size, flour type, and any added ingredients.
FAQs
Conclusion
Baking bread at home doesn’t have to feel complicated or intimidating. This dutch oven bread is simple, forgiving, and easy to make your own. Once you try it, you’ll start thinking about different ways to serve it, tweak it, and fit it into your routine. It’s the kind of recipe that grows with you, whether you’re baking for yourself, your family, or guests. Save it for later, come back to it on a quiet weekend, and let it become one of those familiar kitchen comforts you rely on again and again.

Dutch Oven Bread
Course: Bread Recipe8
servings10
minutes40
minutes300
kcalIngredients
3 cups all-purpose flour
1½ teaspoons salt
1 teaspoon instant yeast
1½ cups warm water
Directions
- In a large bowl, mix flour, salt, and yeast. Add warm water and stir until a sticky, rough dough forms. Cover loosely and let rest at room temperature for 12–18 hours.
- When the dough looks bubbly and has doubled slightly, turn it onto a lightly floured surface. Gently fold it a few times and shape into a round loaf.
- Place a Dutch oven with its lid into the oven and preheat to 450°F (230°C). Carefully place the dough into the hot pot and cover with the lid.
- Bake for 30 minutes covered, then remove the lid and bake another 10 minutes until the crust is deep golden. Cool before slicing.
Printable Recipe Card
Want just the essential recipe details without scrolling through the article? Get our printable recipe card with just the ingredients and instructions.