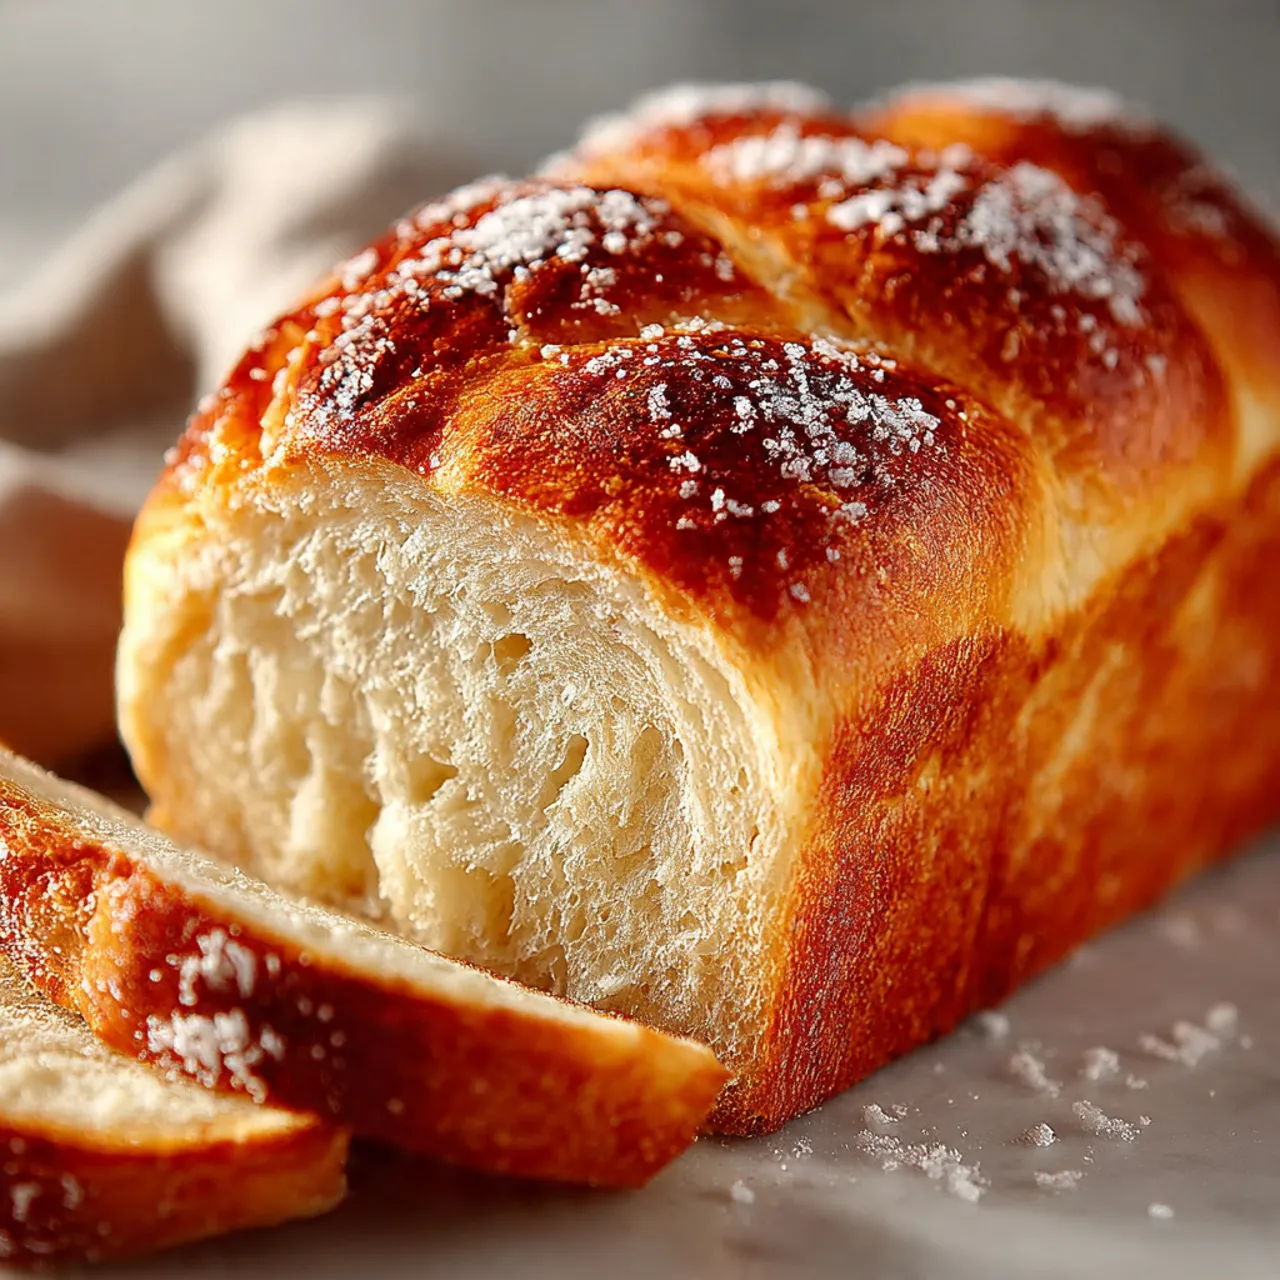
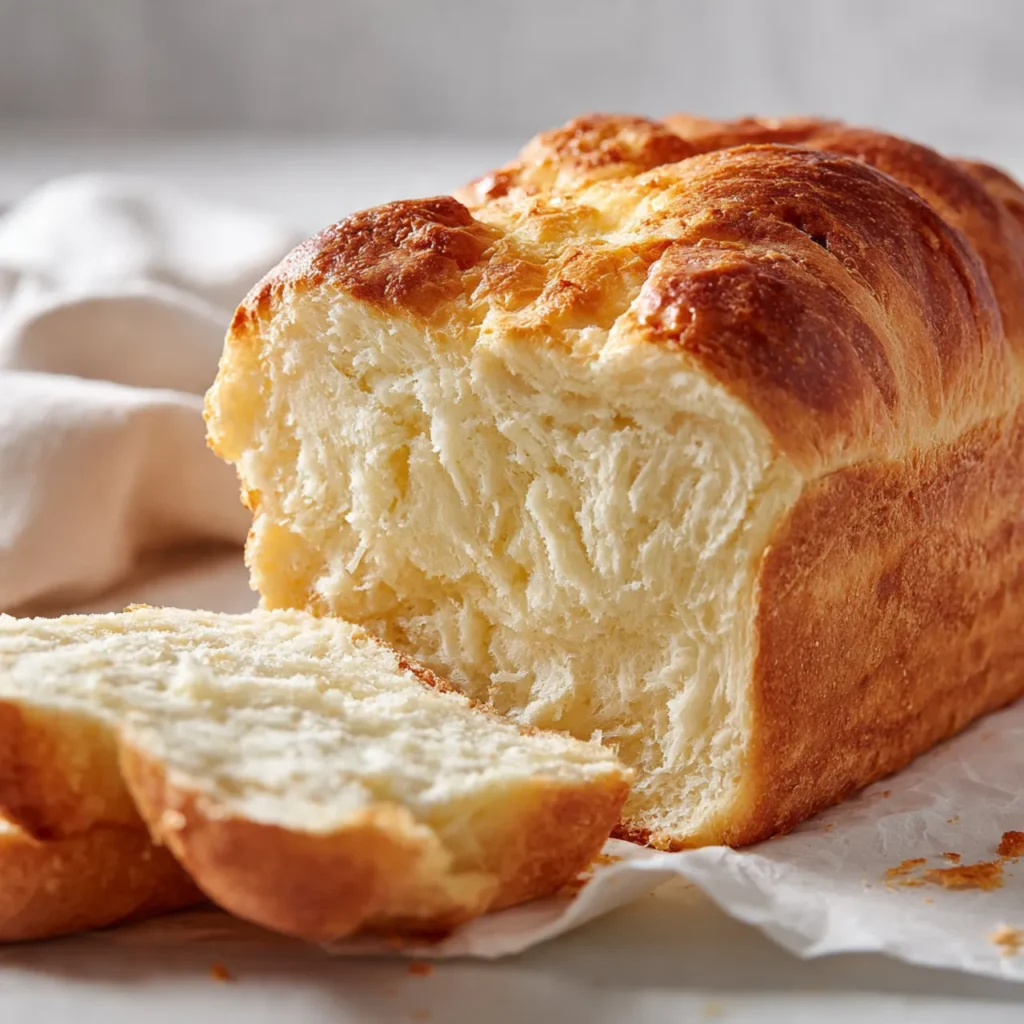
Milk Bread
Milk bread is the kind of soft, comforting loaf that quietly becomes part of everyday life. It’s lightly sweet, incredibly fluffy, and perfect for everything from breakfast toast to evening sandwiches. People love it because it feels homemade in the best way—simple ingredients, gentle flavors, and a texture that stays tender for days. This recipe fits easily into busy routines, family meals, or slow, cozy nights when the kitchen smells warm and familiar. I usually mix the dough while dinner is finishing up, letting it rise as the house settles. It’s the kind of baking that feels calming, not complicated.

Why You Will Love This Recipe
There’s something deeply comforting about pulling a soft loaf from the oven, and this recipe makes that feeling accessible. The bread bakes up pillowy and lightly sweet, without needing fancy tools or hard-to-find ingredients. It’s flexible enough for toast, sandwiches, or a simple buttered slice with tea. This milk bread is also budget-friendly and stretches well across the week, making it great for leftovers. It freezes beautifully, so you can bake once and enjoy later. It’s cozy, crowd-pleasing, and forgiving if your schedule gets busy, which is why so many people save it to make again and again.
Ingredients
Tip: Use whole milk for the softest crumb and richest flavor.
Instructions
Step 1: Preparation
Warm the milk until just slightly warm to the touch. In a large bowl, add flour, sugar, yeast, and salt. Crack in the egg and add softened butter. Everything should look dry and shaggy before mixing.
Step 2: Main Cooking Process
Pour in the warm milk and mix until a soft dough forms. Knead until smooth and stretchy, about a few minutes, until the dough feels elastic and no longer sticky. It should look glossy and feel springy.
Step 3: Combining Ingredients
Shape the dough into a ball and place it in a lightly greased bowl. Cover and let it rise in a warm spot until doubled in size. The dough should look puffy and leave an indent when pressed gently.
Step 4: Finishing & Final Simmer
Shape the risen dough into a loaf and place it in a greased pan. Let it rise again until tall and soft. Bake until golden on top and fragrant. The loaf should sound hollow when tapped lightly.
Why This Recipe Works for Busy Days
This recipe fits neatly into real life. The dough comes together quickly, rises on its own, and doesn’t demand constant attention. You can bake it ahead for the week, slice it for easy breakfasts, or freeze half for later. It’s especially helpful for Pinterest users who save recipes to make when time allows, knowing it’ll still feel worth the effort.
Tips & Tricks
Variations
Serving Suggestions
Storage Instructions
Recipe Timing
Nutrition Information (Approximate)
Calories: 140–170 per slice
Protein: 4–6g per slice
Key nutrients include calcium from milk and carbohydrates for energy. Values are estimates and may vary depending on ingredients, portion size, and slicing thickness.
FAQs
Conclusion
This milk bread is one of those recipes that quietly earns a permanent place in your kitchen. It’s gentle, flexible, and easy to adapt for different meals throughout the week. Once you’ve baked it once, it becomes something you reach for again, whether for simple toast or comforting sandwiches. You can tweak flavors, shapes, or serving ideas to suit your routine. There’s something deeply cozy about slicing into a homemade loaf, and this one makes that feeling easy to come back to whenever you need it.

Milk Bread
Course: Bread Recipe1loaf
servings15
minutes30
minutes300
kcalIngredients
3 cups all-purpose flour
3/4 cup warm whole milk
2 tablespoons sugar
2 tablespoons unsalted butter, softened
1 large egg
2 teaspoons instant yeast
1 teaspoon salt
Directions
- Prepare the Dough
In a large bowl, combine flour, sugar, yeast, and salt. Add the egg and softened butter. Pour in warm milk and mix until a soft, slightly sticky dough forms. - Knead
Knead the dough until smooth and elastic. It should feel soft, stretchy, and spring back lightly when pressed. - First Rise
Place dough in a lightly greased bowl, cover, and let rise until doubled in size. The dough should look puffy and airy. - Shape & Bake
Shape dough into a loaf and place in a greased loaf pan. Let rise again until tall and soft. Bake until golden and lightly fragrant. Cool before slicing.